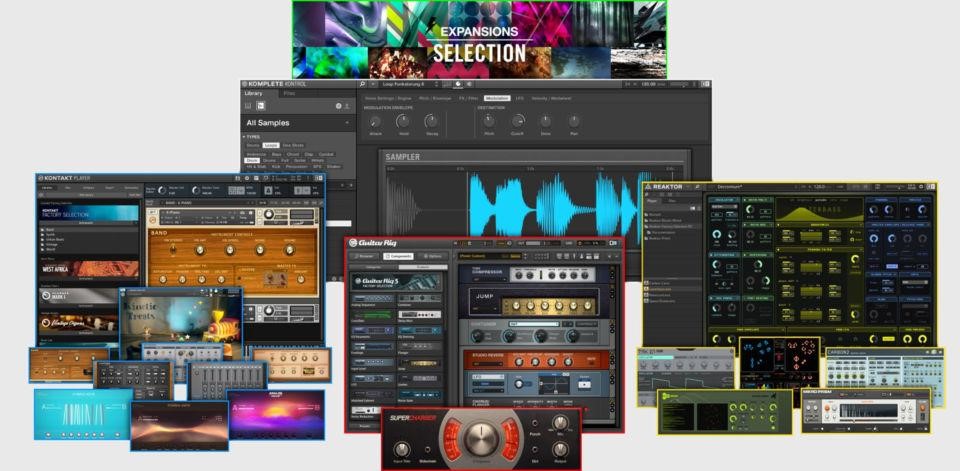
Anyone who has spent any amount of time doing music production will, at one time or the other, have come across the term VST. For those who use Digital Audio Workstations on the Windows platform, VST will for them not be something they have come across but something they deal with every single time they boot up their system to work.
VST, short for Virtual Studio Technology, is an audio plugin format developed by Steinberg. As with all plug-ins, VST is a third party program that can be used within an existing program to perform a specific task. You can get a general idea of what a plug-in is here.
A Little History
The VST plugin format was introduced to the world in 1996 by Steinberg, the same time it released Cubase 3.02. At this time, VST was only used as effects plugins and the Cubase 3.02 came with effects like reverb, chorus, echo, and auto panner, all offered in this format.
By 1999, the format had been updated and version 2 released. VST2 now included the capacity to work with midi or virtual instrument data. This meant that plugins were no longer restricted to being used for effects only. They could now be used as virtual instruments. This also meant that they could now also work outside of a DAW host as stand-alone programs. The first program offered as a VST instrument was Neon.
After several updates still on version 2, version 3 was released in 2008. This update offered additional features that included optional integration for Steinberg Kernel Interface (SKI), audio input provision for VST based virtual instruments, and multiple midis in/outs.
Version 3 has continued to be updated and as of March 2017, it had reached version 3.6.7 and offered features like note expression and support for Linux.
With all the updates, VST plugins can now be grouped into three types and these are instruments, effects, and midi.
To learn more about the developmental story of this plugin format, you can read directly from the creators here: https://www.steinberg.net/en/products/vst/vst_story.html.
Practical Tips for Effectively Using VST Plugins
Let’s now delve into how to effectively use VST plugins.
Installation
As you install and try to use different VST plugins, you are sure to come across different versions. Depending on the plug-in you are installing, you may have little to no issues. However, there may be times when even after installing a plugin, you still cannot find it within your DAW.
One of the most common reasons for this is usually that your DAW did not find it in the folders where it has been set by default to search for VST plug-ins. If this is the case, there are two ways to try to correct this.
The first way is to update the default settings on your DAW to include a path to the folder where the .dll file of the plug-in in question is located.
The second and probably better option is to copy the .dll file into the VST folders that your DAW already recognizes and in which it will go by default to search for VST plug-ins.
Doing any of these two will usually solve the problem of not finding your plugin within your DAW. If however it does not, seek assistance from your DAW’s support or the vendor for the plug-in.
Examples of Effective Application
An important part of getting the best out of any program is knowing exactly how to go about doing that. While there is a lot to be learned in this regard, we will simply share some quick tips as a way of getting you started.
Understand How to Use Bus/Aux Channels
With a huge number of tracks available for multi-tracking, it is now common to have projects with upwards of 30 different tracks. With this amount of tracks to work with, applying effects by inserting plugins into every single track will seriously bog down your computing power. This is something you do not want to happen.
To avoid this, you can create bus or aux channels through which you can route your different tracks and process them in groups, reducing the instances of plugin insertion.
For example, a project with 6 vocal tracks can run each of these tracks through a reverb bus output. In this case, rather than inserting a reverb plugin into each of the 6 tracks, the outputs of each of the 6 tracks are routed to a reverb bus through which the tracks are then played and the amount of reverb required for each track adjusted on the track level.
There is still a level of control on the track level, but it all runs through one reverb plug-in. That is a sixth of the computing power that would have been drawn if each channel had the reverb plug-in inserted directly into them. Take some time to learn how to do this as it will be very helpful in many ways.
Always Compare Before and After Outputs
One of the ways of knowing if your plug-ins are working the way you want them to is to quickly compare a processed and unprocessed signal. Every plugin offers a by-pass function with which you can disengage its effect on the track and also engage it very quickly. Doing this, off and on, will show the difference between the two sounds, giving you a clear picture of the true state of things.
Spend Time Experimenting
A lot of beginner producers and engineers spend more time trying to acquire new plug-ins than they do actually using the ones they have. You will never be able to get enough- just let that sink in. When you look at DAW VST Hub and other such resources, you will always find something new that will interest you. However, as you get new ones (if you must), be sure that you have fully learned how to get the best from the ones you have. The only way to do this is to spend time practicing with them. Try out various settings and see what effect they have on your track, this way, you will know what to do when you need a particular outcome.
Conclusion
Music production is a lifetime endeavor and you will keep learning every day. While some things can look confusing at the beginning, if you keep at it and continue to get and digest as much information on your endeavor as you can, in no time, you will be working with VST plugins and other production tools like a pro.


Like this article? Share with your friends!